Friday, December 25, 2009

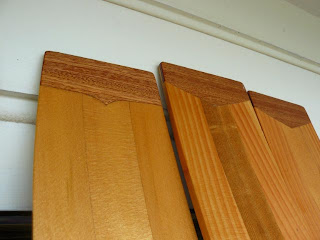
Well, Hi there and Happy Christmas to anyone out there in cyberspace who happens to be following this little account of my boat building activities. More progress has been made over the last few weeks and the end of the build is now in sight - over the last two weeks I have re-built my trailer, finished thh interior work and have applied 6 coats of varnish to the inside, oars and floorboards. Can't show you any photos of the inside at this stage, but here are the oars to give a sneak preview...


She's now turned over and after a nice Boxing Day sanding (thanks to my son-in-law Thomas for the helping hand) I've got the first coat of primer on. I'm using the Epiglass single pot system and will be going for a traditional white... here she is with a grey primer coat on...

Sunday, November 15, 2009

I've made some progress on the oars now so thought I'd update the process. I managed to buy a nice quarter-cut length of Douglas Fir to replace the useless plank that was intended for the job and I've now cut out the blanks for both sets of oars. Pete Culler recommends building spoon bladed oars from two lengths of 150 x 25 glued together, but I've had to go for 50 x 50 section gluing 'wings' to the ends of the main stock to form the blades. The main reason for this is that at present I don't have a bandsaw and so I'm having to cut the curves with a jigsaw and so am limited to the width I can cut through. Actually, I now have two jigsaws - its just that one has blown up doing this job and I've had to pop out today to buy a replacement ... unexpected costs in boat building! So the first photo shows the rough blanks of Kauri stock guied up and the second shows the two Douglas Fir oars taking shape - not finished yet but the lower of the two is starting to look the part and I'm pleased with the way they're taking shape...

Saturday, October 31, 2009

Thought I'd throw in a post to show recent progress on the oars that I need to make. Oar-making is also a new enterprise for me, so I have read a bit about the topic and have decided to make spoon - bladed oars. The boat plans include dimensions for oars that are 2.365m long - 7'8" in imperial measure. Some books have indicated I could do longer oars for the beam of the boat but as a novice I'm sticking to the designers' instructions. Two pairs of oars are needed so I've recently bought a couple of beams to provide the stock. I've been unable to find any spruce in NZ so have opted for either Douglas Fir or Oregon. NZ White Pine (Kahikatea) was another option, but all the stock I could find was treated and a little green in colour which didn't really appeal. The first beam I bought was advertised as Oregon but turned out to be Kauri which I was delighted about! The second beam was Douglas Fir but unfortunately this turned out to be so knotty I don't think I can use it. However, I made some progress with the Kauri and the photos show progress so far. I think the Kauri will be a little heavier than some other options but its such beautiful wood I couldn't go past it. So, as you can see, I started with two large chunks of wood and now have two smaller chunks of wood ready to become oars plus a large pile of shavings!


Monday, October 5, 2009

Well here's the last photo's for a while - all that remains to be done is glue in the floors, fit the thwarts and make and fit knees for them, then sanding and varnishing can begin... probably in a couple of months' time given that I'm back to work next week .


I'm also going to turn up supports for the centres of each of the thwarts, although this will mean that the floorboards will have to be cut in half - though I think they have to be to get them in and out anyway. I am getting very excited about how its all going to look varnished - but a fair bit left to be done before that stage!


Thursday, October 1, 2009

I've had a week off work and have been making great progress... although all the scraping and sanding still remains to be done, most of the timber work is well under way. What has been surprising is how long this has taken me - every little piece takes much longer to fit than on a piece of rectangular furniture because of the curves in all dimensions. Fun though! Not all the joins are as perfect as I would like them, but I think they are "good enough" and the eposy certainly fills the odd gap here and there!

I have opted for 'open gunwales' largely because of the traditional look - it was a lot more work making all the spacer blocks but I think it looks good:


Having finished the gunwales I moved on to getting the floors shaped (a photo of this later) and fitting the thwart risers, which are full-length, I guess adding rigidity to the hull. Then it was on to making up the floor boards, which I have cut from some old tongue-and-groove Kauri. Good to use recyled materials, but again a lot of extra work drilling and plugging nail holes to improve the look. I have glued spacer blocks between each of the boards and the very front and back so that these will be smooth - I remember in boats in the past the annoyance of various strings and things getting caught around the ends of the floorboards!


Friday, September 25, 2009


Here are the first photos of the boat with all the frames and battens removed. I have decided to finish the gunwales in open style and so am now working on cutting and fitting the spacers and inner gunwale - like everything with this boat building I'm finding it pays to have heaps of clamps!


The next two photos show the breasthook and quater knees fitted and ready to receive the ends of the inner gunwale:


Tuesday, September 8, 2009

In early August, all the planking was complete (7 'planks' per side) and I was at turn-over stage. For those who are wondering, a standard sheet of ply is 1220 x 2440 (4 feet x 8 feet) and so to make them long enough for the 4.7m Port Sorell the sheets are sawn in half, end to end and the
two halves then joined to create lengths of ply that are 600mm x 4880mm. (See the photo of the scarfing process on 7 Sept posting).


Here she is, sitting on the trailer that I'm hoping will end up being used for transport. At the moment its just a convenient location for the next stage of work. Trailers are wickedly expensive, so I bought this one cheap as a 'do up' and have welded various extensions onto it to make it big enough - unfortunately it is still too weak, flexing in the middle around the central axle and so will need more surgery later - for now its on with the bit that really interests me - the boat!


Here's a couple of photos of the inside - obviously still showing the frames and stringers which will have to be removed next. Before that happens I aim to glue on the outer gunwales to give some more strength to the sides and get the breast hook and quarter knees cut to size.


This photo shows the detail of the transom knee - the staining around the transom is water stains from my having to soak the hog in order to bend it over the last 500mm to get the shape to fit properly. I've managed to get most of the staining out by soaking the entire transom in water - hoping the rest will sand out eventually...


Monday, September 7, 2009

This blog is an account of my experience in building a Port Sorell rowing skiff, and although some of this will be retrospective as I am already 6 months into my build, I hope to also log future progress. I'm also interested if there are other folk out there building Port Sorell's....
So, my build began back in March 09 with the arrival of plans from Selway Fisher in the UK. Although the Port Sorell can be built in 'stitch and tape' style, I have elected to build in clinker ply, hoping for a more traditional look. I have plently of cabinet making experience and a few boat repairs, but this is the first boat building project from scratch, and it is being done in my spare-time and holidays from my work as a teacher (you have to love the holidays!) So, here she is, back in April sometime, with the strongback built, frames cut and erected, stringers recessed into the frames (I gather you don't have to do this but chose to as it looked a sensible option) and the hog fitted to transom and inner stem. I laminted the inner stem from two fantastic NZ timbers, Kauri and Rimu and think it will look quite nice when all finished.


Here's a close-up of the inner stem showing the laminations of Kauri and Rimu - each layer being approximately 4mm thick. The whole thing took a fair bit of bending around a mold to get the right shape but has ended up pretty rigid.

The ply sheets have to be 'scarfed' - trimmed on an angle so that they can be glued end to end to create lengths long enough for the 4.7m boat. This photo is of the scarfs that I chose to prepare with hand plane - a little wavy in places but it was fun cutting these by hand rather than with the router.
Laying on of the ply planking began in May... I'm using 6mm marine ply. Getting the shapes correct by spiling from the shape of the stringers took some practice and I got better as time went on .... until completely messing up the last plank! Luckily I had a little spare and so didn't have to go out and buy a whole new sheet. So far, costs have been around NZ$500 for the marine ply, West system epoxy, materials for the strongback, frames, stringers etc.